A few months ago at PhotoCon in New York I came across a clever modular setup of knobs, buttons, and sliders that could be connected together in different ways, and used to control parameters in software like Photoshop and Lightroom. This was right up my street, as I am both a sucker for unusual input devices, and also not a huge fan of having to use a mouse for repetitive tasks. As it happens, I make music with a bunch of different electronic instruments (link), and immediately wondered about whether these particular gadgets could be used to send MIDI data to control synthesizers etc as well. However, it wasn’t long before the obvious reverse question came up: Rather than buy a dedicated device just for Lightroom, why couldn’t a MIDI controller (with far more features) be used instead?
The MIDI Fighter Twister
I’ve collected a bunch of different MIDI controllers, as a result of my obsession with weird and wonderful input devices. Unfortunately, none of them were really perfect for Lightroom processing. Since I edit photos on my laptop, and often when travelling, I wanted a controller that would be portable, with lots of knobs. Most MIDI controllers had a mix of pads, knobs, and sliders; were too big; or didn’t intuitively match Lightroom’s layout. Enter, the MIDI Fighter Twister…

The MIDI Fighter Twister is a relatively small, square controller from DJ Tech Tools. It has a bank of 16 assignable knobs which handily also double up as pressable buttons. Each one can be configured in a variety of ways, and set to display different colours. It’s light, but feels well built and solid.
At this point I’m aware that this might be beginning to sound like an ad. It’s not. I genuinely just like the MIDI Fighter range. However, there are a couple of things about the Twister in particular that either I’d change, or that are worth pointing out:
- The Twister is a reasonable size, but not tiny. It’s small enough to balance on the arm of the couch when I’m working, but is substantial enough that I’d need to really think about whether it was worth taking when travelling.
- There are a number of preset ‘banks’ available for different configurations, which can be switched by buttons on the side. I’d personally prefer there to be some kind of visual indicator of which bank is currently active (like the MIDI Fighter 3D with its buttons on top).
- The rubbery texture of the Twister can get or at least seem grubby pretty easily. I started off with a white one but debated switching to black for this reason.
- It would be nice to have a small case for the Twister to protect it when taking it places, as opposed to just using the box that it came in.
You can get custom coloured knobs to personalise your device further, but they aren’t cheap by any stretch of the imagination (about £46 for a set of 16 in the UK, or less than half that if you are in the US) – so I’ve opted to stick with the stock ones for now.
MIDI2LR
There are a bunch of different ways to connect your MIDI controller to Lightroom, including both paid and free solutions. The one I’ve found easiest to set up was MIDI2LR, but you might want to investigate some of the others, like KnobRoom. Both of them work best with Lightroom 6+.
The configuration for MIDI2LR is as straightforward as:
- Installing the plugin.
- Pressing the button or twisting the knob that you want to map on your controller.
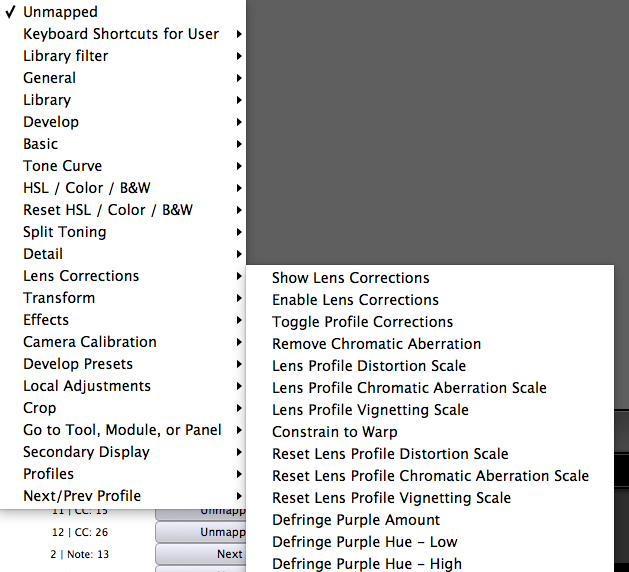
- Selecting the Lightroom function that you want to assign to that particular control.
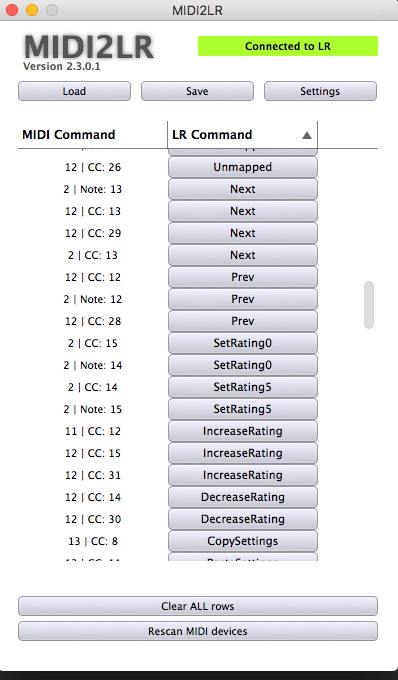
Pretty much anything you can think of in Lightroom can be mapped, from basic exposure and contrast controls, to browsing through the library.
My Mapping
Below shows what controls I’ve mapped to each of the Twister’s knobs – with the corresponding colours. There is some kind of logic to the colours… in that temperature goes between blue and yellow, with tint going between green and magenta. The bottom row knobs also have functions mapped to their secondary ‘click’ action, which let me browse through the library and mark photos as 5 or 0 depending on whether or not I want to keep or delete.

If you have a MIDIFighter Twister, you can download my mapping for the lights below:
and the MIDI2LR settings here:
So, is it any good?
I sometimes fall victim to certain ideas that sound cool in theory, but which aren’t actually very useful in practice. Luckily, this isn’t one of those situations. I spend all day typing on my computer for work, and so to have a different way to interact for certain tasks makes a huge difference. Having a dedicated knob for each function rather than having to move the mouse from slider to slider is a bit quicker, but more importantly, it feels far nicer and more intuitive. Probably most importantly of all, I can now lie on the couch hungover and edit photos with only one hand.
You can read more about the MIDIFighter Twister here. Expect to pay about £200 for one second hand if you’re in the UK, or $220 if you’re in the US.